Difference between revisions of "MIFID2"
| Line 66: | Line 66: | ||
'''Step : 1 ''' | '''Step : 1 ''' | ||
Open the '''Users list''' screen and click the '''Edit''' icon of the user to whom you want assign [[ProductCoverage|'''groups''']] and a specific [[E-file_Administration#New_e-file_user_profiles_.28e-file_v2.29 |'''profile''']]. | Open the '''Users list''' screen (see screen above) and click the '''Edit''' icon of the user to whom you want assign [[ProductCoverage|'''groups''']] and a specific [[E-file_Administration#New_e-file_user_profiles_.28e-file_v2.29 |'''profile''']]. | ||
[[File:Edit.png|800px]] | |||
'''Step : 2 ''' | |||
The '''User details''' screen opens. Click the '''Groups''' icon. | |||
[[File:UserDetails.png|500px]] | |||
'''Step : 3 ''' | |||
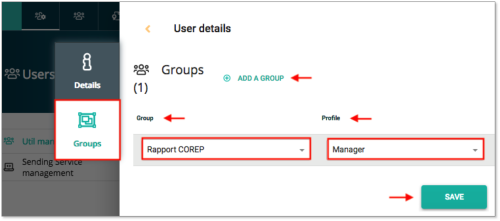
The '''User details / Groups''' screen opens. | |||
Select the groups you want to assign and click the '''ADD A GROUP''' button. Once you have added all the groups, click the '''Save''' button. | |||
Please be informed that you can find a detailed information on all groups on our Wikipage [[ProductCoverage|'''Product Coverage''']]; column <u>e-file user account: "groupe"</u>. | Please be informed that you can find a detailed information on all groups on our Wikipage [[ProductCoverage|'''Product Coverage''']]; column <u>e-file user account: "groupe"</u>. | ||
| Line 72: | Line 95: | ||
Example: if a user has to submit '''COREP reportings''' to the CSSF, the e-file administrator must assign the <u>group</u> '''Rapport COREP''' and the <u>profile</u> '''Manager''' to the user. | Example: if a user has to submit '''COREP reportings''' to the CSSF, the e-file administrator must assign the <u>group</u> '''Rapport COREP''' and the <u>profile</u> '''Manager''' to the user. | ||
[[File: | |||
[[File:AddGroupProfile.png|500px]] | |||
Revision as of 09:36, 30 September 2018
Create a new e-file user
Step 1:
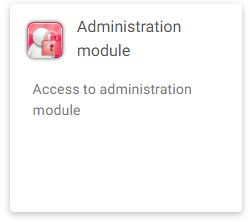
Connect to e-file.lu with your e-file administrator login (adminXXX) and click the Administration module icon.
Step 2:
Click the Users button
Step 3:
Click the Create a user button
Step 4:
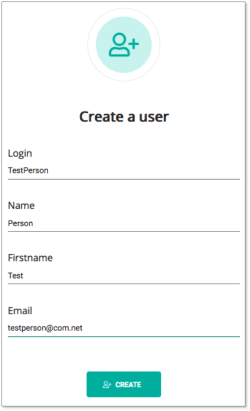
The Create a user window pops up. Complete the form as indicated in the picture and click the Create button.
Step : 5
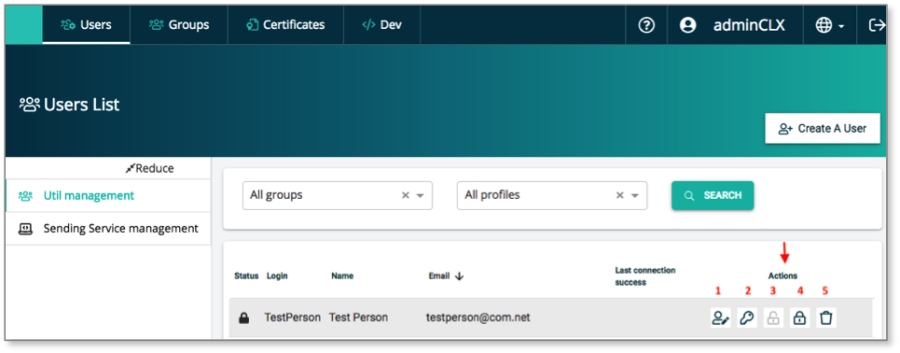
Go back to the Users list screen. Move the mouse over the user you just created. Five icons will appear allowing to perform the following actions:
Action 1: Edit user settings
Action 2: Force password change. An email is sent to the user with a web-link to reset his password.
Action 3: The user is locked. A new user will automatically be unlocked when he logs in for the first time.
Action 4: Lock the user.
Action 5: Delete the user.
Assign groups and profiles to users
Step : 1
Open the Users list screen (see screen above) and click the Edit icon of the user to whom you want assign groups and a specific profile.
Step : 2
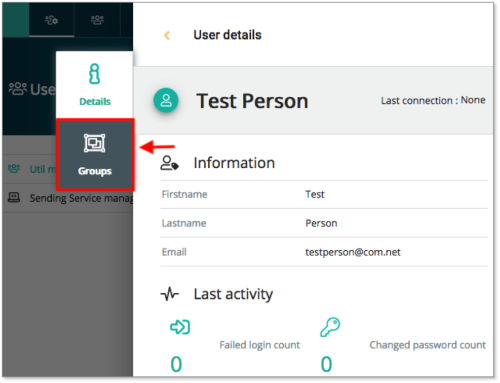
The User details screen opens. Click the Groups icon.
Step : 3
The User details / Groups screen opens.
Select the groups you want to assign and click the ADD A GROUP button. Once you have added all the groups, click the Save button.
Please be informed that you can find a detailed information on all groups on our Wikipage Product Coverage; column e-file user account: "groupe".
Example: if a user has to submit COREP reportings to the CSSF, the e-file administrator must assign the group Rapport COREP and the profile Manager to the user.
